Hello everybody, I hope you are having an amazing day today. Today, I’m gonna show you how to prepare a distinctive dish, easy meat wrapped cheese onigiri using kitchen parchment paper. It is one of my favorites. For mine, I am going to make it a little bit unique. This is gonna smell and look delicious.
Easy Meat Wrapped Cheese Onigiri Using Kitchen Parchment Paper is one of the most well liked of current trending meals on earth. It’s simple, it is quick, it tastes yummy. It’s enjoyed by millions daily. They are fine and they look wonderful. Easy Meat Wrapped Cheese Onigiri Using Kitchen Parchment Paper is something which I’ve loved my whole life.
Parchment paper - also known as. Get the cheese ready: Place the parchment or waxed paper flat on your counter and arrange the un-wrapped wedge on top. Wrap up the cheese: Bring the edges of the paper up and around the cheese, creasing as you go to make neat, clean folds.
To get started with this particular recipe, we have to first prepare a few ingredients. You can cook easy meat wrapped cheese onigiri using kitchen parchment paper using 9 ingredients and 6 steps. Here is how you can achieve that.
The ingredients needed to make Easy Meat Wrapped Cheese Onigiri Using Kitchen Parchment Paper:
- Get 16 slice Shabushabu pork belly meat
- Make ready 400 grams Plain cooked rice
- Prepare 1 use as much (to taste) Easy melting cheese
- Prepare 1 dash Parsley
- Get 2 tbsp ◎Sake
- Make ready 2 tbsp ◎Mirin
- Make ready 2 tbsp ◎Soy sauce
- Prepare 1 clove ◎Garlic (grated)
- Get 6 30 cmx20 cm pieces Cooking paper
We love onigiri because they are so easy to adapt to your own flavour combinations, and a great way to use up leftover ingredients. When Maxence and I traveled to Japan two years ago, one of the treats I These easy onigiri are a swell option to consider if you pack your lunch to bring into the office, or if Add the furikake and mix it in gently with a wooden spatula, using a cutting gesture to separate rather. Parchment paper, also often called "baking paper," is a super handy item to have in your kitchen! It can be used on baking sheets, inside cake pans, and on other baking containers to act as a barrier between the dish and the food being baked or cooked.
Steps to make Easy Meat Wrapped Cheese Onigiri Using Kitchen Parchment Paper:
- Put the ingredients marked with ◎ and the meat into a plastic bag, mix together, and put it in the fridge for 30 minutes.
- Thinly spread 50 grams of rice on plastic wrap, and top with meltable cheese. Wrap both ends like a piece of candy and mold it into oval shapes.
- Make 4 more rice balls following step 2. You can make these without plastic wrap, but I suggest using it since it is easier and you won't get your hands dirty!
- Remove plastic wrap from step 3, and wrap the marinated meat length-wise around the rice ball.
- Cover the remaining rice balls length wise with meat. Use 4 slices of meat per rice ball.
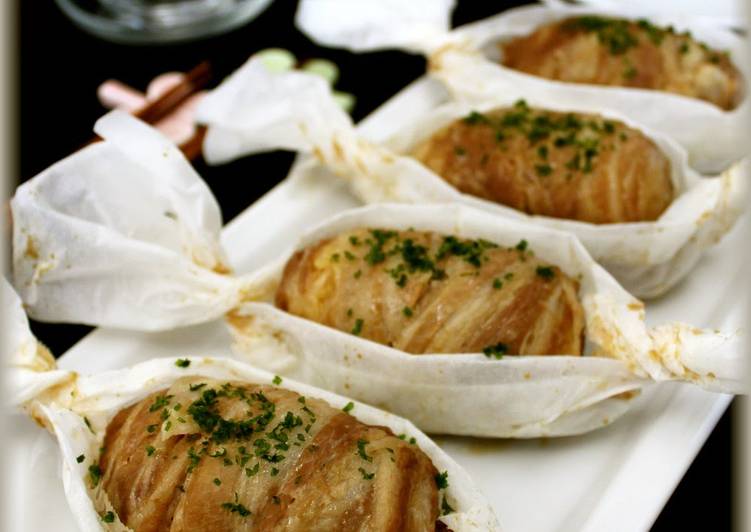
- Wrap the rice balls from step 5 in parchment paper like candy. After wrapping them, place them facing up on a microwave-safe dish and microwave at 600W for 8 minutes.
It keeps food from sticking or burning on the. Another easy and delicious onigiri (albeit and acquired taste) is umeboshi. The latest experiment I tried was using chocolate as the filling and seasoning the onigiri with sugar. You can do a similar soboro with canned/packaged salmon. I used smoked because I love how the flavour permeates the.
So that’s going to wrap this up for this exceptional food easy meat wrapped cheese onigiri using kitchen parchment paper recipe. Thank you very much for your time. I’m confident that you can make this at home. There’s gonna be interesting food in home recipes coming up. Remember to bookmark this page in your browser, and share it to your family, friends and colleague. Thank you for reading. Go on get cooking!